Turn a Photo Into a Tracing Outline
You Can Paint Straight Over

In short: Sketchso converts a photo into a printable outline at 8–15% opacity — light enough to guide your hand, light enough to disappear under watercolour, graphite, oil, acrylic or ink. You print it onto your own paper and paint over it. It is a tracing guide, not a sketch-effect filter. Preview free.

Print direct on paperNo lightbox neededVanishes under any medium
Prefer a guided flow?Open converter
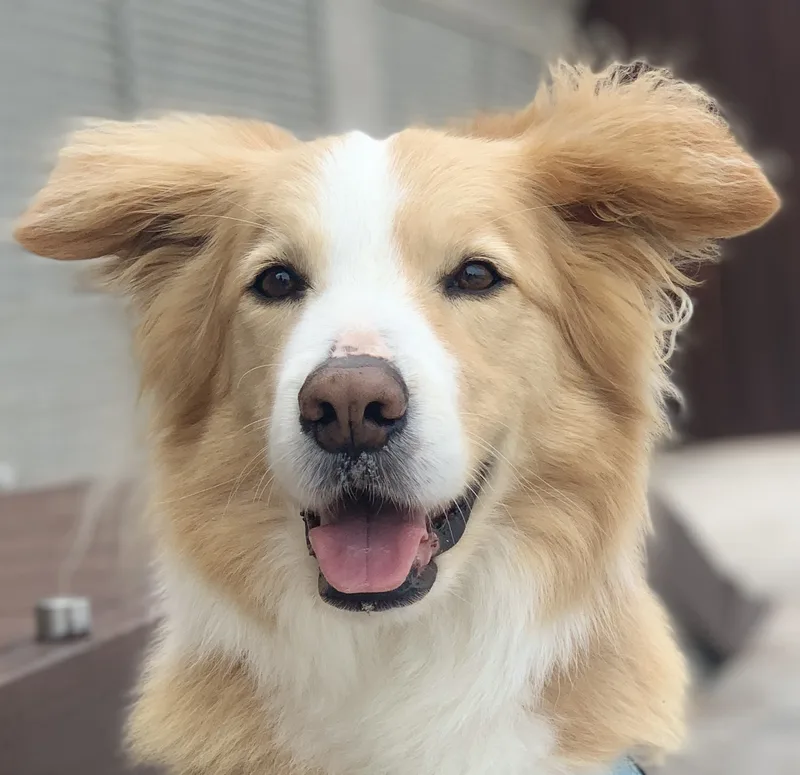
Original photo
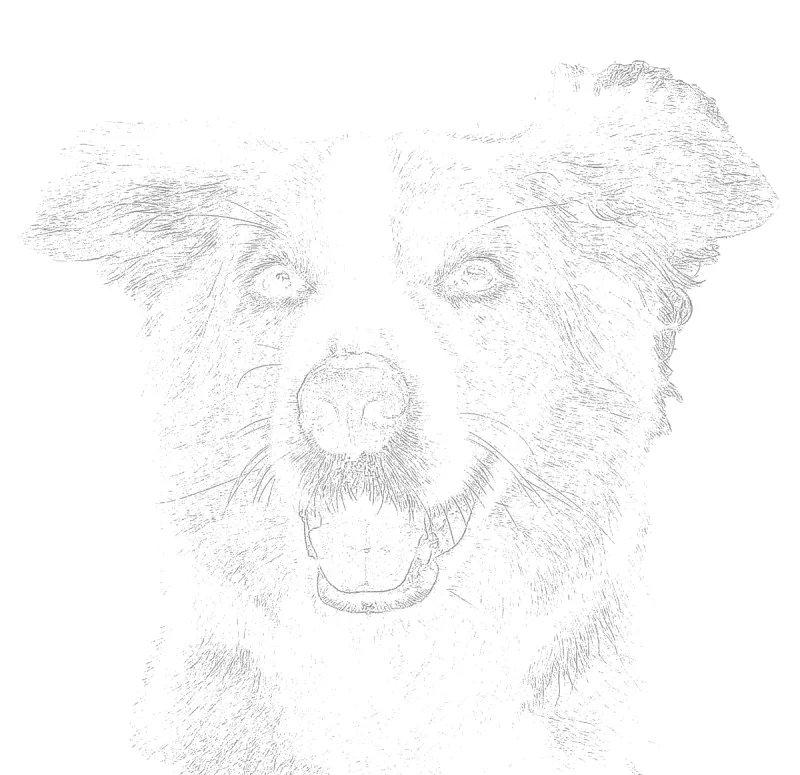
Sketch preview
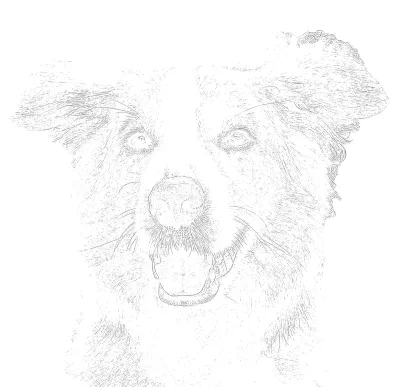
Tracing outline generated from the reference photograph, shown at tracing opacity
Original reference photograph used as the reference before outline conversion
Drag to compare

Clean preview feedback for tracing, painting, and print-ready planning.

The Reference

Start with any high-resolution photo of your subject.

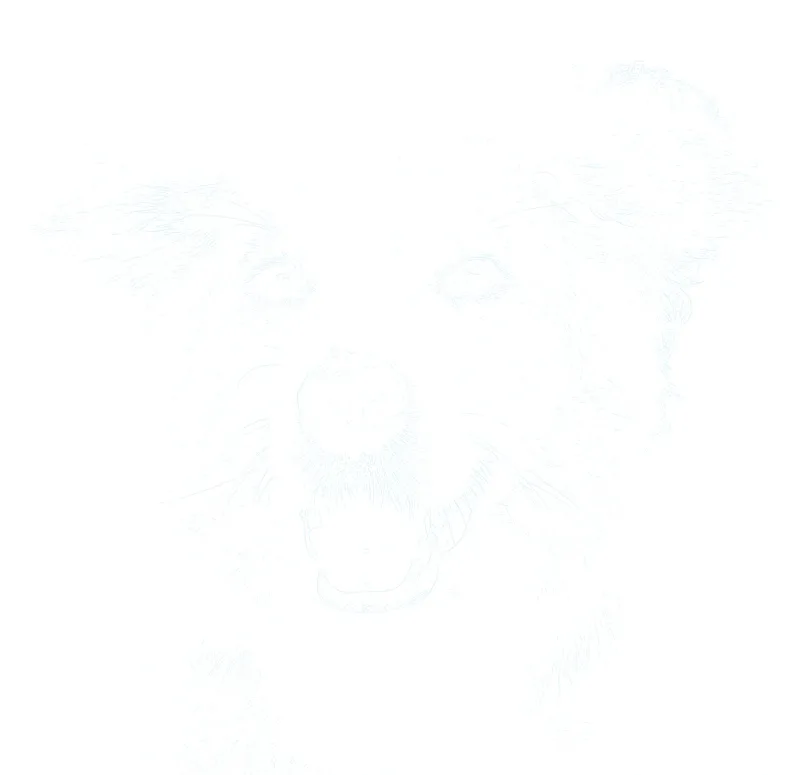
The Guide

Preview and print a clean, perfectly proportioned outline.

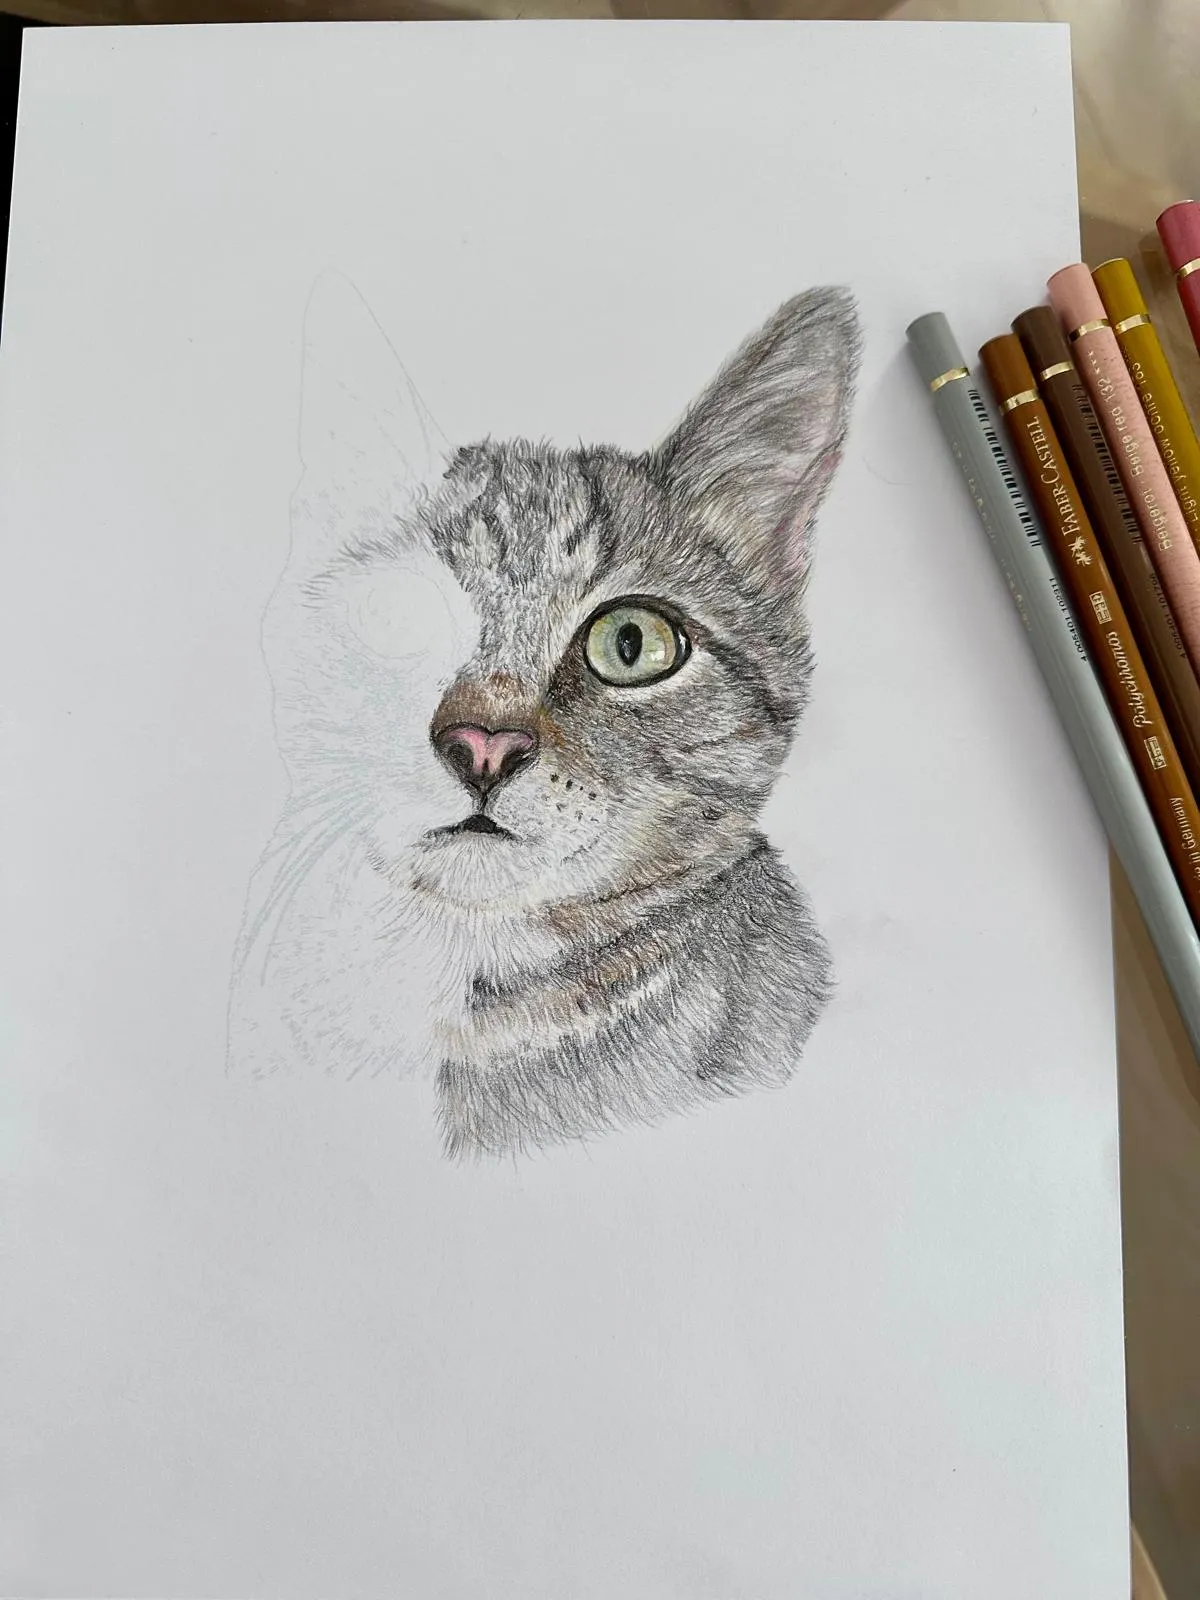
First Layers

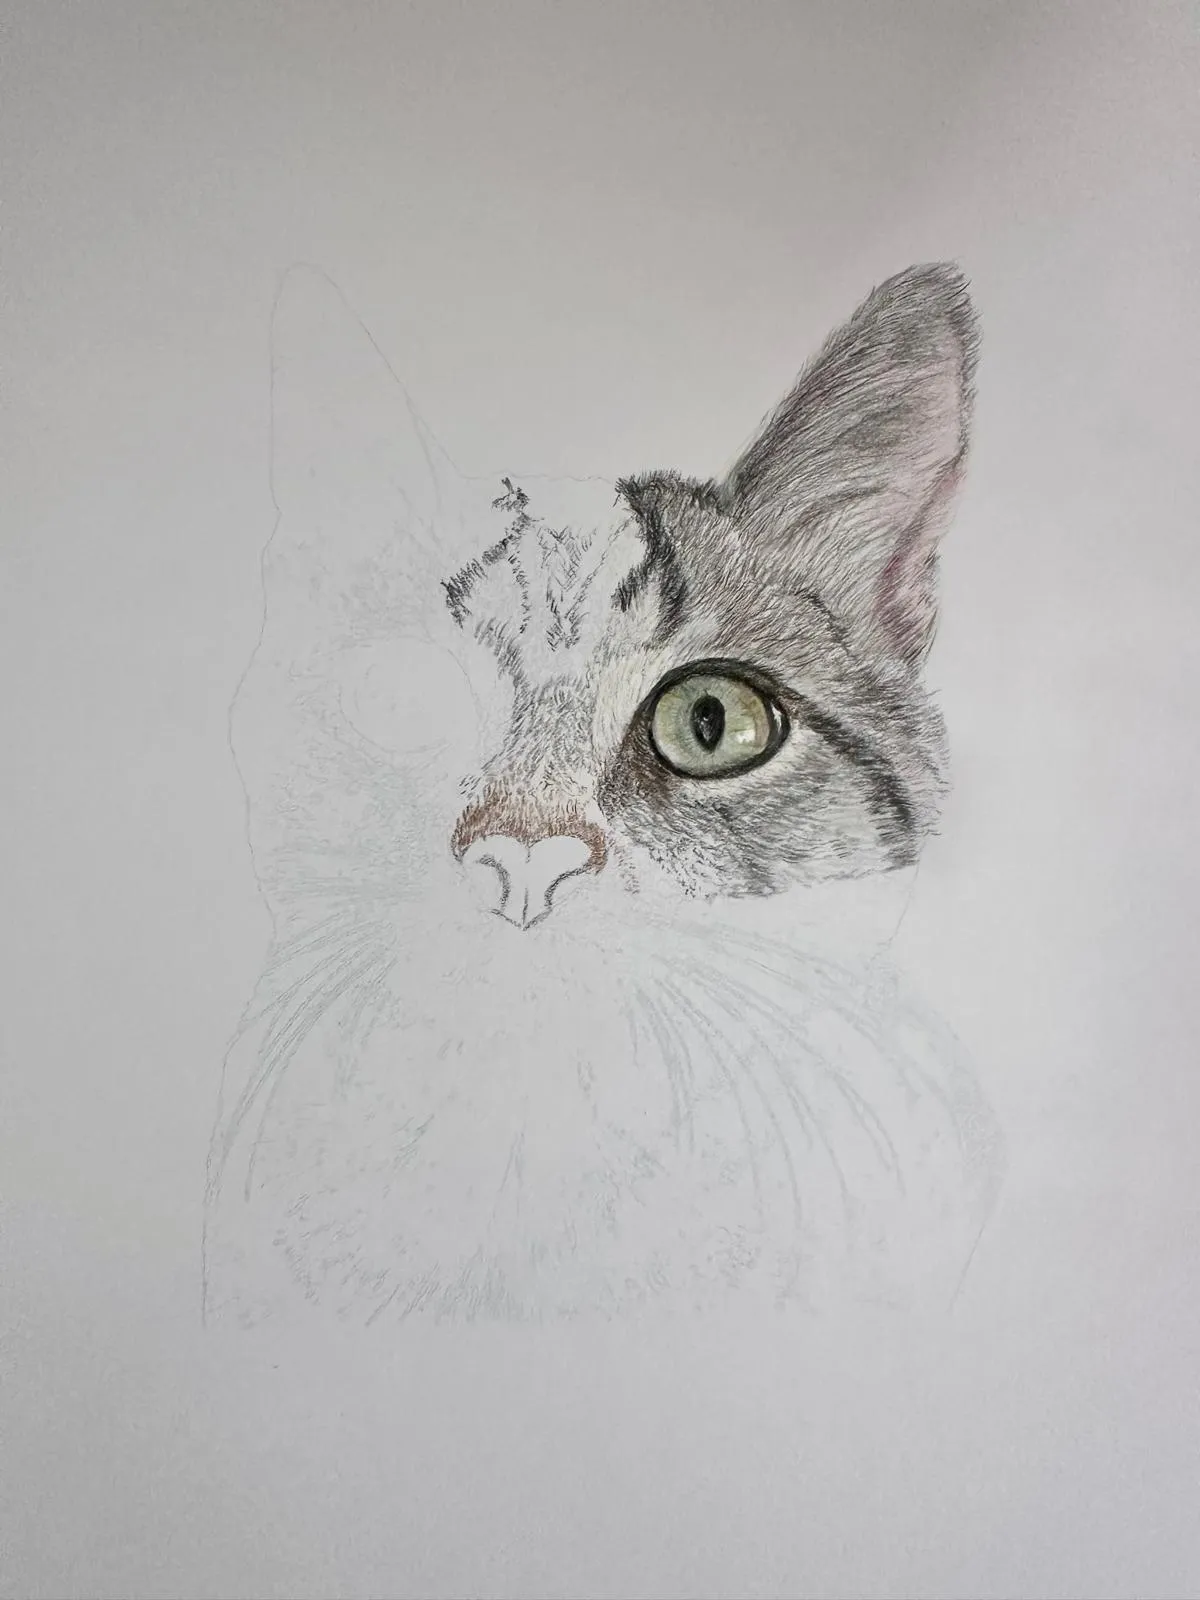
Block in your initial colors directly over the faint sketch.

Building Details

Refine textures and build depth without losing your structure.

The Masterpiece

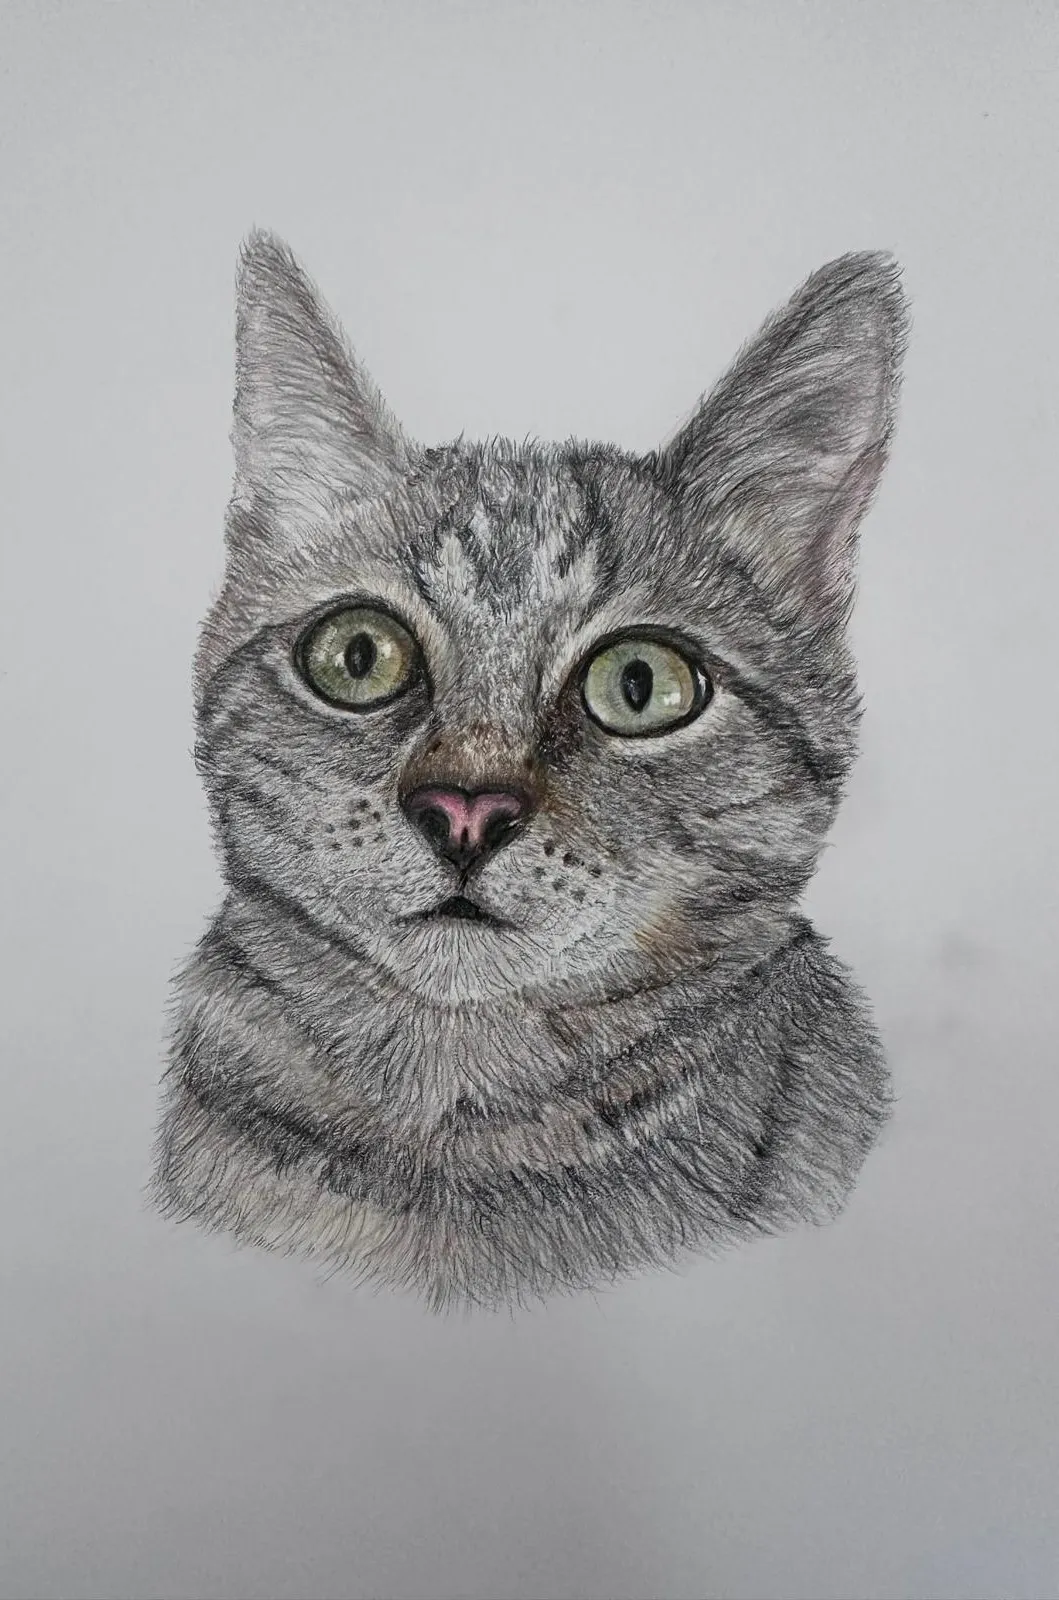
Authentic, hand-crafted artwork, completed in half the time.

Scroll to create art

What is an invisible tracing outline?

An invisible tracing outline is a line drawing extracted from a photograph and printed at very low opacity — typically 8–15% grey — so that it is just visible enough to follow with a brush or pencil, and faint enough that the first layer of paint or graphite covers it completely. It is a preparatory guide, not a finished image.

The distinction matters because most tools that turn a photo into a sketch are doing the opposite job. A sketch filter produces a finished-looking pencil rendering with cross-hatching, paper texture and shading baked in — an image to post or print as-is. An invisible tracing outline strips all of that away. There is no shading, no texture, no artificial pencil grain. There is only the structural edge information.

What you are buying with a tracing outline is proportion. Most paintings that go wrong go wrong in the first ten minutes, and they go wrong structurally — the eyes end up too far apart, the muzzle too short, the building's perspective drifts. Those errors are close to unfixable once you are three washes deep, because watercolour in particular does not forgive being moved. Locking the architecture down before the first wash removes that failure mode.

The physical form matters too. A tracing outline is designed to be printed onto the surface you will actually paint on — watercolour paper, drawing paper, bristol, or a sheet you will transfer to canvas. It is not designed to be looked at on screen. That is why opacity is the critical variable: too dark and the line survives the first wash and shows in the finished piece; too light and you cannot see it under studio lighting. The 8–15% range is where those two constraints meet for most combinations of paper and medium.

Read the complete guide to invisible tracing outlines

Will the tracing lines show in my finished painting?

Under an opaque or semi-opaque medium, no — at 8–15% opacity the guide is covered by the first application. Under a very pale, very transparent watercolour wash, it can survive, and this is the one case where the technique needs care rather than confidence.

The variable is not really the medium, it is how much pigment ends up sitting on top of the line. Graphite, coloured pencil, ink, marker, gouache and acrylic all deposit enough material to bury an 8–15% grey line completely and immediately. With these, opacity choice barely matters — anything under about 20% disappears.

Watercolour is the case that requires attention, because a first wash of, say, a dilute yellow ochre sky may be lighter in value than the guide line underneath it. Two things fix this. First, drop to the bottom of the range — 8% rather than 15% — for any passage you know will stay pale. Second, place your guide lines where the dark passages will fall and rely on observation for the light ones, which is what you would do with a graphite underdrawing anyway.

We have not tested every paper and ink combination. If yours behaves differently, tell us and we will publish the result.

Which art mediums hide tracing outlines best?

Graphite, coloured pencil, ink and gouache hide an 8–15% outline completely with no technique adjustment at all. Watercolour hides it in mid and dark passages but needs the outline dropped toward 8% in pale areas. Oil and acrylic bury it entirely when used opaquely, but need transfer rather than direct printing because canvas will not go through a printer.

Tracing outline compatibility by medium
MediumHides the guideSuggested opacityNotes
Graphite pencilCompletely10–15%No adjustment needed
Coloured pencilCompletely10–15%Layers cover fully
Ink & penCompletely10–15%Guide can stay visible while you work
GouacheCompletely10–15%Opaque by nature
AcrylicCompletely10–15%Transfer needed for canvas
OilCompletely10–15%Transfer needed for canvas or panel
MarkerCompletely10–15%Check the paper takes marker without bleed
WatercolourIn mid and dark passages8–10%Pale washes may not cover — see below

Two situations fall outside the table. Very pale, very transparent work — a high-key portrait, a misty landscape where most of the paper stays near-white — is the hardest case for any underdrawing, printed or pencilled, and is the one place where working from a separate reference beside you may simply be better. And any surface that will not physically pass through a printer (stretched canvas, wood panel, board, paper heavier than roughly 200gsm on most consumer inkjets) needs the graphite transfer route rather than direct printing.

Can you print a tracing outline onto watercolour paper?

Often, but not always, and this is the step that most often goes wrong. Most consumer inkjet printers handle paper up to roughly 200gsm through a rear or straight-through feed path. A 300gsm (140lb) cold press sheet will jam a front-loading tray that has to bend the paper around a roller. Check for a rear feed slot before you trim an expensive sheet.

Method 1 — direct rear-feed printing

If your printer has a rear or single-sheet straight path, trim the paper to A4 or 8.5×11, feed one sheet, select the heaviest paper setting your driver offers, and print at 100% scale. Hot press and smooth papers take ink most reliably; rough surfaces can produce a broken line, which is usually fine for a guide. Laser printers are a poor choice here — the fuser heat can cockle damp-sized paper.

Method 2 — graphite transfer

Works on anything, including canvas and panel. Print the outline on ordinary copier paper at full darkness. Turn the sheet over and scribble a soft graphite pencil (4B or 6B) across the back, covering the area behind the lines. Tape the sheet face-up onto your surface, then trace the printed lines firmly with a ballpoint pen or a stylus. Lift a corner partway through to check the pressure before you commit to the whole drawing.

Method 3 — window or light pad

Print on copier paper, tape it to a window or a light pad, tape your painting surface over it, and trace. This only works up to about 200gsm — the reason light boxes exist is that 300gsm watercolour paper is effectively opaque, and it is the specific problem that printing directly onto the sheet is meant to solve.

Method 4 — digital

Import the high-resolution PNG as the bottom layer in Procreate, Photoshop or Krita, lower its opacity, lock the layer, and paint above it.

How to trace a photo onto watercolour paper covers paper choice and wash sequencing in more depth.

Is this a real alternative to a light box?

For paper heavier than roughly 200gsm, printing directly onto the sheet solves a problem a light pad cannot: 300gsm watercolour paper does not transmit enough light to trace through, however bright the pad. For lighter paper, a light pad works fine and is a one-off purchase. Which is better depends almost entirely on the weight of paper you use.

Printed outline vs light pad vs freehand
 Printed outlineLight padFreehand / grid
Works on 300gsm paperYesNoYes
Works on canvas or panelVia transferNoYes
Cost$5.99/moOne-off hardware costFree
Setup timeMinutesMinutes20–60 min per piece
Needs a printerYesNoNo
Builds drawing skillPartiallyPartiallyYes

When not to use a printed outline

If you paint mostly on 200gsm or lighter, a light pad is a one-time purchase and does the same job without a subscription — buy the pad. If you work large, beyond what your printer can output, tiling a guide across multiple sheets is more trouble than gridding. And if your reason for painting is to get better at drawing, a guide will slow that down; grid method or sight-size measurement is the honest answer, and we would rather say so than sell you a subscription you will resent.

The case where a printed outline clearly wins is the common one: heavy watercolour paper, a subject with proportions you can't afford to get wrong — a commissioned pet portrait, a face someone will recognise — and a limited amount of studio time.

How is this different from a photo to sketch converter like Fotor or Canva?

A photo to sketch converter produces a finished image that looks like a pencil drawing. Sketchso produces a faint guide that is meant to disappear. If you want something to post, print and frame, or use as a profile picture, use Fotor, Picsart or Canva — they are free and they do that job well. If you want to make the painting yourself, the two tools are not substitutes.

The visible difference is shading. Sketch filters add cross-hatching, paper grain and tonal rendering, because their output is the artwork. That baked-in texture makes them useless as a tracing guide: it is too dark to hide under paint, and it commits you to tonal decisions you have not made yet.

The second difference is opacity control. A sketch effect is rendered at full strength by design. A tracing outline needs to land in a narrow 8–15% window, and that number needs to be adjustable against your paper and medium.

The third is what happens after download. A sketch filter's job ends at the file. A tracing outline is one step in a physical workflow — print scale, paper weight, transfer method, how the guide behaves under a wash.

Sketch effect tools vs tracing outline tools
 Sketch effect (Fotor, Picsart, Canva)Tracing outline (Sketchso)
OutputFinished pencil-look imageFaint structural guide
Includes shadingYesNo
Meant to be visibleYesNo
Designed for printing on art paperNoYes
Best forSharing, gifts, profile picturesPainting and drawing prep
PriceFree tiers availableFree preview, $5.99/mo to export

Is tracing a reference photo cheating?

No, and the historical record is unambiguous on this. Vermeer is widely argued to have used a camera obscura; Canaletto's use of one is well documented; David Hockney and Charles Falco's 2001 Hockney–Falco thesis argued that optical aids were in common studio use from the fifteenth century onward. The thesis remains contested among art historians — that is worth saying plainly — but the narrower claim that working painters have used projection and tracing aids for centuries is not seriously disputed.

The more useful question is whether it slows your development, and the honest answer is: it depends entirely on how you use the guide.

Passive tracing does hold you back. If you run a pencil along a printed line without looking at the reference photo, without asking why the edge turns where it turns, you are doing handwriting practice. The result tends to look flat, because you have copied contour without understanding form.

Active use does not. Use the guide for placement and keep your eyes on the reference for everything else — value, edge quality, colour temperature, where an edge should go soft. You are still making every artistic decision. What you have removed is the measuring, which is a technical task, not a creative one, and which is where most beginners exhaust their patience before the painting starts.

There is a real trade-off and we won't pretend otherwise: measuring by eye is a skill, and if you never do it, you will not develop it. If your goal this year is to draw accurately from life, do the measuring — start with drawing accurate proportions from a reference photo. If your goal is to finish paintings you are happy with, and the drawing stage is what stops you starting, a guide is a reasonable tool. Most people move between the two over time.

Sketchso manifesto

Start with structure.
Finish with your own hand.

We are a specialized studio that converts photographs into ultra-light tracing outlines that completely disappear under watercolor, graphite, oil, or acrylic.

Fundamentally different from tools like Canva or Fotor that create finished digital sketch effects, Sketchso creates a preparatory guide for traditional physical art. It's a modern replacement for the lightbox—solving the physical limitation of tracing through thick watercolor paper.

Ultra-light 8–15% opacity outlines vanish under traditional media.

Print direct. Replaces bulky $50–$200+ lightboxes.

Privacy by design. We never store or use images to train models.

Calm, fast, artist-friendly

How do you turn a photo
into a tracing outline?

Upload the photo, adjust a single detail slider until the outline shows the structure you need without the noise you don't, then download and print it at 8–15% opacity onto your painting surface. The conversion takes a few seconds and runs in the browser; the part that takes judgement is choosing how much detail to keep.

01

Start with the right reference

Outlines are extracted from edges, so the source photo governs the result. A portrait shot in flat overcast light produces mushy, hesitant edges; the same face with a clear light source on one side produces a clean outline. If you cannot see the form in the photograph, no edge detection will invent it.

02

Set the detail level — low, usually

This is the step most people rush. High detail traces every eyelash and every brick, which sounds appealing and is usually wrong: it gives you 400 lines to follow and turns painting into colouring-in. Start low for portraits and animals. Go higher for architecture and botanical work, where the detail is the subject.

03

Print at 100% scale, then paint over it

Feed the paper you intend to paint on, set opacity to 8–15%, and print at 100% scale — not "fit to page", which will silently resize your composition. If your printer cannot take your paper, use the graphite transfer method described below instead.

Premium workflow tools

More than a quick sketch effect.
A studio-ready starting kit.

When you decide to download, Sketchso supports the rest of the workflow too: sizing, transfer, planning, and a cleaner bridge from reference image to finished piece.

High-res outline files

Clean, printable guides that stay crisp when you scale up for larger paper sizes or canvas transfer.

Grid & sizing support

Keep placement and proportions more consistent when moving from screen to physical surface.

Color planning tools

Use the generated palette and workbook pages to think through the painting before the first wash or mark.

Artist workbook included

Reference pages, workflow prompts, and guidance designed around how artists actually prepare finished work.

Learn the techniques behind the workflow

Explore practical guides for drawing, painting, tracing, and transfer so the tool fits naturally into the way you already work.

Studio-grade workflow

Why artists keep
Sketchso in the loop

It is not about replacing observation or craft. It is about making the early setup phase calmer, faster, and more reliable so you can spend more energy on the actual artwork.

Visual feel

Outlines stay subtle

Light

Light guide lines are tuned to support watercolor, graphite, ink, and paint instead of competing with the finished artwork.

Early access spots

Early access

100

Join the first 100 artists shaping this tool and locking in lifetime pricing.

For physical media

Medium-Specific Tuning

Tuned

The workflow supports printing, transferring, and drawing from real references with optimized outputs for watercolor, oil, pencil, and canvas transfer.

Practical details artists care about

What exactly is the file
and how do you print it?

A single high-resolution outline file, printed at 8–15% opacity and 100% scale onto the surface you will actually paint on.

The output is a single high-resolution file with no shading, no paper texture and no artificial pencil grain — only the structural edges: where the jawline sits, where the eye socket falls, where the horizon meets the treeline. That is deliberate. Baked-in tone is what makes a sketch filter useless as a guide, because it is too dark to hide under paint and it commits you to tonal decisions you have not made yet.

Print at 100% scale, not "fit to page", which will silently resize your composition. Set opacity between 8% and 15% against the paper and medium you are actually using, and run one test on an offcut before committing to a full sheet — the difference between hot press and rough is larger than the difference between 8% and 15%.

Pigment-based inks sit on the surface and read darker than dye-based inks, which sink slightly into the sizing. If your first test looks heavier than expected, that is usually why, and dropping two or three percentage points corrects it.

Private by default

Your images stay private

Sketchso processes the image you upload to create the outline you need without turning your artwork into a public gallery or background asset library.

Processed for the outline only

Your upload is used to generate the outline and nothing else.

No stored artwork library

We do not keep a catalog of your personal reference images.

Never used for model training

Your photos are not published in a gallery or used to train models.

Social proof

Trusted by artists who want a better first step

Browse reviews, results, and shared artwork from artists using Sketchso across portraits, pets, landscapes, and studio studies.

4.9★ across all 16 reviewsCollected directly from artists, not a review platform
Premium online converter for artists

Bring in a photo.
Leave with a better starting point.

Preview the outline free, refine only what matters, and unlock downloads, printing, or the workbook only when the workflow is ready for your studio.

Free preview

See the structure before you pay for finished files

Premium exports

Unlock PNG, PDF, printing, and workbook access when needed

Built for art

Useful for watercolor, oil, pencil, and canvas transfer

Preview Your Outline Free
No signup to preview
Instant online preview
HD download, ready to print

Built for the moment between reference and real artwork

Made to support—not replace—your processUseful across multiple mediumsPreview instantly before you commit

What does Sketchso cost?

Previewing an outline is free and needs no signup — upload a photo and see the line quality before deciding anything. Downloading, printing at high resolution, and the workbook require the studio plan at $5.99 per month, with a 30-day money-back guarantee.

The free preview exists so you can answer the only question that matters before paying: does the outline this tool produces from your photo, at the detail level you need, look like something you can paint over. Photo quality varies enormously and no amount of copy on this page substitutes for running your own reference through it.

The studio plan covers high-resolution outline files that stay crisp when scaled up for larger paper, grid and sizing tools for placing the guide accurately on the sheet, a generated colour palette from the source photo, and the artist workbook.

On whether it is worth it: if you paint on 200gsm or lighter, a light pad is a one-off purchase that does most of this, and you should probably buy one instead. If you work on heavy watercolour paper, on canvas, or you paint often enough that the setup time compounds, the subscription is the cheaper end of the comparison.

Preview the converter freeStudio plan pricing

Common questions

Will the tracing lines show in my finished painting?
Under an opaque or semi-opaque medium, no. At 8–15% opacity the guide is covered by the first application of graphite, coloured pencil, ink, marker, gouache or acrylic. Under a very pale transparent watercolour wash it can survive, so drop to around 8% for passages that will stay light.
Can you print a tracing outline onto watercolour paper?
Usually, if your printer has a rear or straight-through feed path. Most consumer inkjets handle up to roughly 200gsm. For 300gsm paper, canvas or panel, print on copier paper and use the graphite transfer method instead.
Is tracing a reference photo cheating?
No. Optical aids such as the camera obscura have been used by painters for centuries. Using a guide for placement while observing the reference for value, edge and colour leaves every artistic decision with the artist. Passive tracing without observation does limit development.
How is this different from a photo to sketch converter?
A photo to sketch converter produces a finished image with shading and paper texture, intended to be seen. A tracing outline is a faint structural guide intended to disappear under paint. They are not substitutes.
What file formats can I upload?
JPG, PNG and WebP. Higher-resolution photos with clear directional lighting produce cleaner outlines than flat, low-contrast images.
What happens to my photos?
Uploaded images are processed to generate the outline and are not stored in a library, published in a gallery, or used to train models.
Can I use the finished artwork commercially?
The artwork you paint is yours. Copyright in the source photograph is a separate question — if you did not take the photo, check its licence before selling work derived from it. This applies to any reference photo, traced or not.
Can I use this for canvas?
Yes, via graphite transfer. Canvas cannot go through a printer, so print the outline on copier paper, shade the reverse with a 4B pencil, and trace through onto the canvas.

Most Popular Guides

Our most-read guides for mastering photo tracing across every art medium

Ready to Start Creating?

Put your knowledge into practice with our free photo to sketch converter. Create professional invisible tracing outlines in seconds!

Try Free Tool Now

Browse by Subject

Master drawing your favorite subjects